Tools We Use
As with any job, you need good tools. Our best tool is the Gammill Statler we bought last year and, as timing would have it, they were rolling out their latest software. Good for us, helped with the learning curve as we started on the latest version of software. It allows us to do so many creative things for our customers. The options include using patterns that came with it, purchasing new ones, and designing our own patterns. The other software that is critical is our invoicing software. It allows an easy way to make an invoice, but also collect costs, look at trends, etc. Below is the Statler controls.

The ol’ dusty loom early on in its’ career.
Right behind the machine and software, in terms of importance, is our bobbin winder and Towa gauge. The bobbin winder is an electric, stand alone piece that winds 100 yards of thread onto the bobbins in 40 seconds. The Towa gauge is used once the bobbin is wound to check the tension of the bobbin. If that tension is off, it’s a bad day! Spending $52 on that gauge has been better than spending that much (or more!) on Tylenol.

Behind the Towa gauge are extra bobbins.
Next key item is our tape measure. Crazy as it sounds with so much being automated these days, our tape measure gets a lot of use. When a customer brings their top in, we measure it as we fill out their work order card. Then when it gets loaded on the long arm, we measure it again. Mainly to ensure it is centered on the back, but also, we think it’s good to trust, but better to verify. This attention to detail helped us realize most quilts are up to an inch shorter after they have been quilted. The stitching draws the size in the final size of the quilt.
Paper and scissors. Both are basic tools that get a lot of use in our shop. The paper is our work order form. There are notes to be made for each top and we found creating a form, with our logo as the watermark, on cardstock was a great way to jot down all the necessary info on each quilt. The scissors is just that. A sharp pair used for cutting batting to load onto the long arm as well as snipping threads as the long arm does the work.
We have all heard “Necessity is the mother of invention” and that’s the case with TGQ. Some things are simple, like our needle boneyard (photo for this journal entry) and others involve perfecting an idea. Since we free float quilt tops, which means we don’t attach the quilt top to the frame, it just lays on top of the batting which is on top of the back. The reason we prefer this method is you can adjust as the long arm is running. For example, a block that has many seams meeting will be very thick and may pucker a bit. When you free float, you can adjust and keep things smooth. That’s no problem on a baby quilt or a table runner because these are smaller projects, however on big jobs, we didn’t like having the back, batting, and top “bunching up” on the floor. We learned of an idea from fellow Statler users and modified it a bit to suit our needs because we are in a small space. Being on casters is perfect because it’s out of the way on the small jobs and ready to go on big jobs. The casters also allow for us to stand and move easily because the height of the sling is elevated. Below you see the modified sling with a queen size quilt nestled in it.
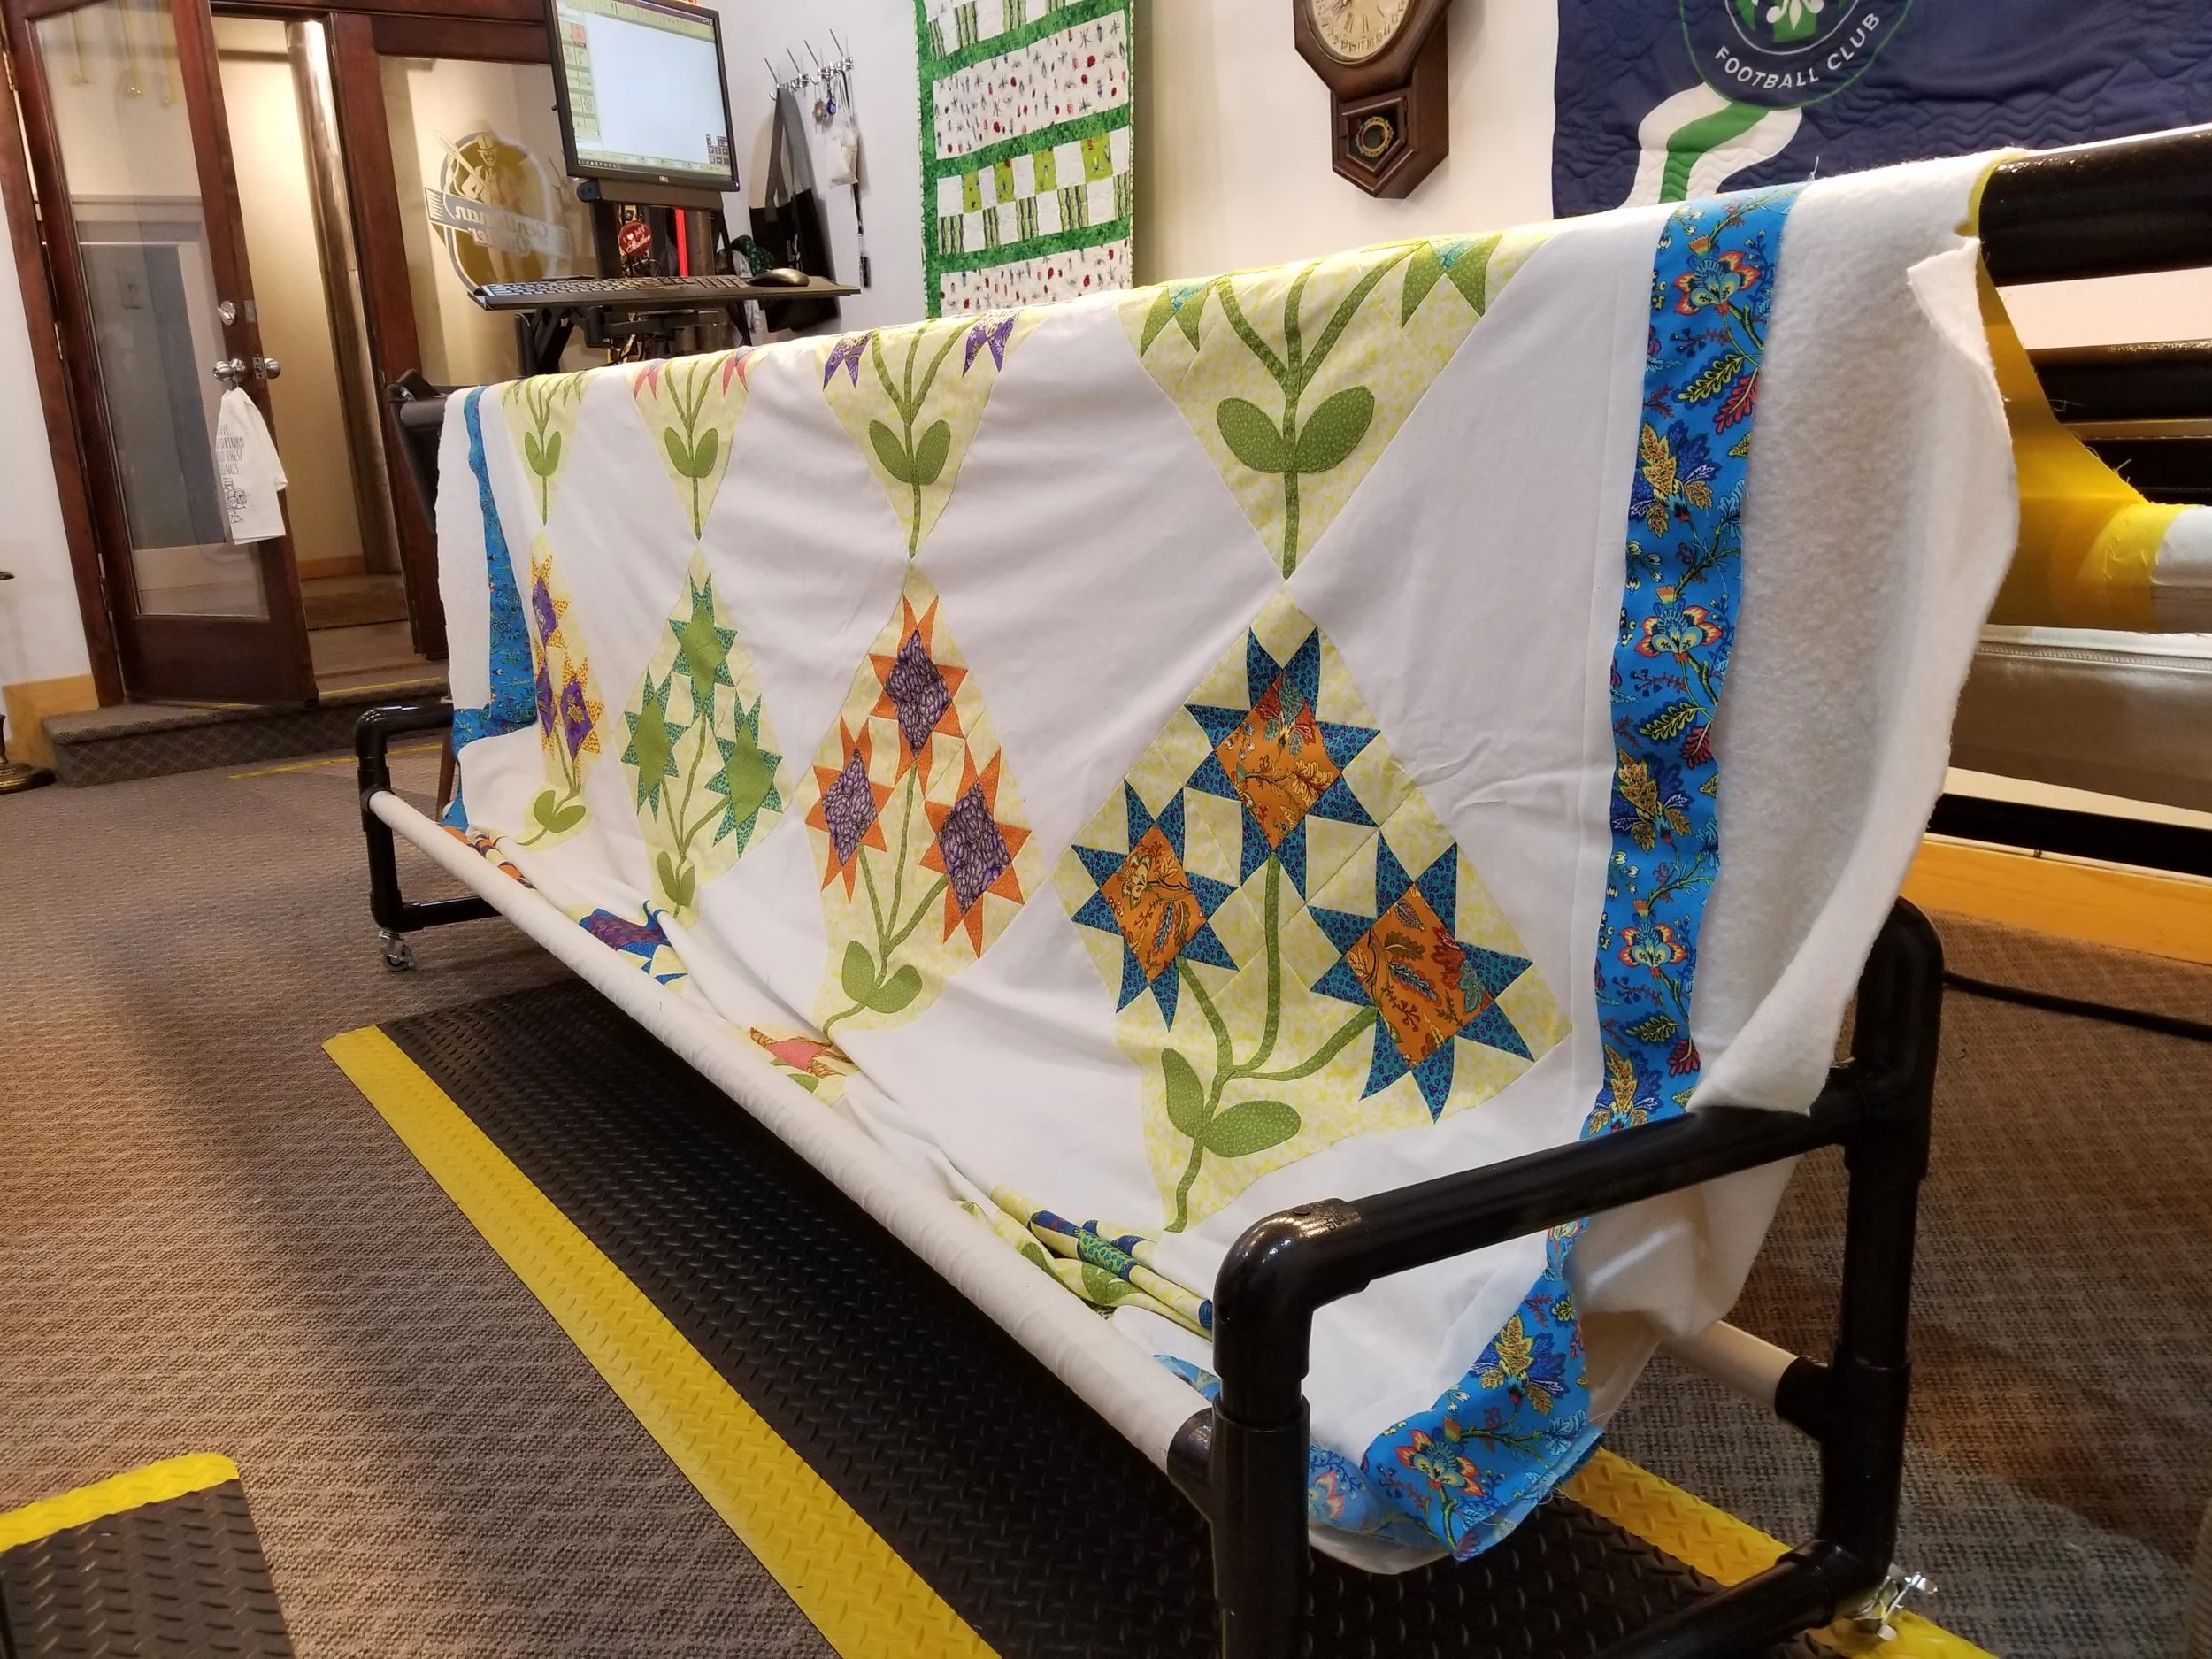
Inaugural use of our custom built sling. Works like a charm!!
Feet are important in this job! A hopping foot on the long arm helps on thick seamed projects like t-shirt quilts or paper pieced jobs where there are many seams intersecting at one point. The hopping foot goes up and down the same as the needle so it glides over the bulky seam easier than a regular foot because it compresses the fabric and batting at the same time. Note to self: don’t have your finger under there, it hurts like %#*@ when it gets caught. A friend told me this . . .

Here are three of the feet we often use when quilting on the Statler as well as an inverted spool to hold scissors and seam ripper.
One thing we hadn’t thought about was how much lint and dust would be produced by our long arm as it quilted quilts. A few tools we use to battle this air pollution include an air compressor to keep all machines clean (think a massive can of canned air!), vacuum cleaner to pick up threads and dust from the carpet, and an air purifier to pull the particles out of the air. Using these three things have made a noticeable difference. It’s healthier for us and provides a nice clean quilt for our customers.
There are a few other tools used when doing custom work and any quilter will be familiar with these. A quality sewing machine is a good investment and I have an Elna. A new customer, Courtney, told us about a gentleman who specializes in old machines and I’m excited for him to have a look at my Mom’s Elna. This is what I learned to sew on and used up until about 4 ½ years ago. I was told parts are no longer available and decided to get a new model. These models are work horses. I wish they came with odometers so I knew how many hours is on the older one. The sewing table is below.

Above both models of Elna sewing machines.
Good tools to cut fabric are key and I use Olfa brand mats, rulers, and rotary cutters. They allow for precision and sewing on a good machine with a quarter inch seam allowance is half the battle. What is the other half you ask? Pressing your seams well. I use a Rowenta iron to do so. I learned in a class that cutting, sewing, and pressing were the three most important things you can do when making a quilt top and I have to agree. Since focusing on all three, my seams have been better and this allows for easier quilting. Below my mat, ruler, rotary, fabric ready for cutting, and the colour catcher used to prep this fabric. More on colour catchers to follow . . .

The ruler and rotary cutter takes care of the frayed edges and selvages. This colour catcher took care of pulling the dye out so no future bleeds onto other laundry items or the rest of the quilt.
A new add when we moved into this space that I didn’t have at home is my design wall. It is a table cloth from the dollar store with the top (slick) side stapled to the wall. The back is a felt-type fabric and blocks stick to it. When a customer brings in their top, we put it on the design wall so they can look at their top and the computer screen at the same time to start deciding quilting pattern options. Standing back from the top gives a different perspective than looking at it on a table. The perception is skewed because one part of the top is nearer to the eye than the other. If you don’t have the space for a design wall, lay the top on the floor and stand over it with a camera to get the “dead on” perspective.
There is debate on whether to pre-wash fabric or not. I was taught to do so and I use a colour catcher (sold with laundry detergent) and it is amazing how fabrics will bleed. Especially batiks. Speaking of batiks, when I sew with those, I use a couple products before even washing the fabric. Synthrapol helps pull colour out and Retayne helps set the colour. Both can be found at most fabric stores. I think a good investment of my time and money just to be on the safe side - just have a look at the catcher in the photo above.
Well, what does that leave us? The ol’ trusty seam ripper. We would like to say we never use ours, but sadly, we do on occasion. I was given this one for my birthday one year and told before I opened it, “Hopefully you will never use this gift!” At least if a stitch has to come out, this looks pretty in hand! And while I’m referencing old, the little ruler in the photo below has so many miles on it. I don’t know when Mom got it, but I know I use it every project.

This little ruler verifies my seam allowances. Both seam rippers are shown above. One with cap on and one with it off so the seam ripper is exposed. The sunflower is always by machine to help me keep a good perspective on life.
It’s funny, I had the idea to write this in the very beginning, maybe doing as a “Top Ten List” and didn’t think I would have enough tools. Turns out we have a pretty solid list. Maybe it will give others some ideas to add to their sewing routine.
If you ever want to stop in to see some of these tools in action or check out our set up, please feel free. Call or text 314.478.9777 when you have the time to stop in and be sure to allow a little extra time to check out the great shops and restaurants near us. You could easily make a day of it!
In the meantime, always buy the best tools you can when doing any job. It really makes all the difference! Happy Sewing and Quilting from TGQ!!!